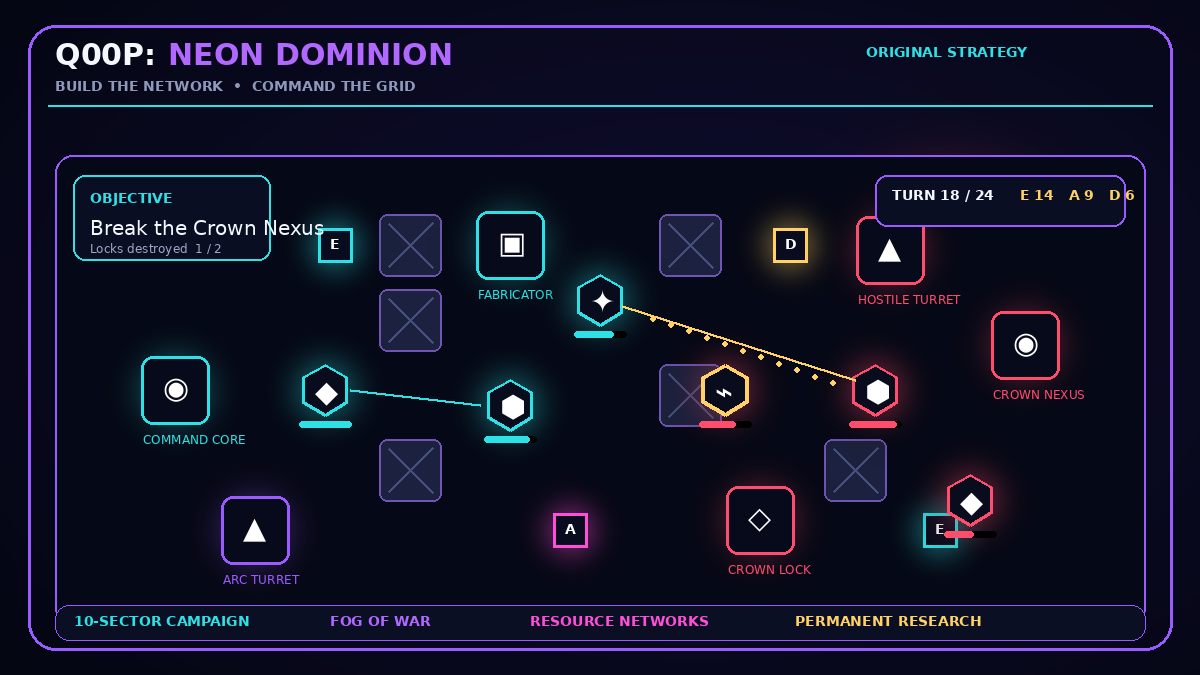
Build scope for this Neon Dominion unit guide
This unit guide has been checked against Q00P: Neon Dominion v1.0.0, release ID 20260801044240-nw1pdmr4xtkkl91s, validated on August 1, 2026. The release archive SHA-256 is 5acf6ac6774574479b8b6f503706b19232a24b1ae2b0b182ad0be56442a1b030.
The current package defines the same four specialist roles discussed below—Pulse Runner, Aegis Sentinel, Prism Lancer, and Cipher Hacker—inside the published ten-sector campaign. Mouse, keyboard, and touch input are documented by the package, while campaign and research progress are stored in Local Storage. This note identifies the exact build used for the role analysis without claiming separate device testing that is not part of the package record.
Neon Dominion gives every friendly unit a distinct job. The four classes are not stronger and weaker versions of the same soldier. Pulse Runners create mobility and capture pressure. Aegis Sentinels hold valuable ground. Prism Lancers apply ranged damage from protected lanes. Cipher Hackers disable hostile structures and create breach windows.
The strongest army uses those roles together. Building only one class can work for a few turns, but the Crown AI adapts through production, defenses, and map pressure. This guide explains what each unit contributes, where it should stand, and how to combine the roster without wasting actions.
Pulse Runner: capture, scout, and redirect pressure
The Pulse Runner is the fastest unit and the natural relay specialist. Its main value is movement. It reaches neutral nodes early, reveals fogged terrain, recaptures distant relays, and threatens a second lane while the main army fights elsewhere.
A Runner should avoid fair frontline exchanges. Speed is wasted when the unit stands beside a Sentinel and attacks the same target every turn. Instead, look for spaces where movement creates an economic or positional change.
Good Runner tasks include:
- Capturing an Energy or Alloy relay before the Crown reaches it.
- Revealing the next section of a route without committing the whole army.
- Taking a weak hostile relay to reduce enemy income.
- Returning to a rear node that has been recaptured by the Crown.
- Drawing one hostile unit away from the main objective.
- Reaching a mission tile that requires mobility more than durability.
The Runner still needs support. Do not send it so far into fog that every retreat path can be blocked. A useful advanced position should connect to the friendly network or to a route the rest of the army can reach soon.
Aegis Sentinel: hold the tile that matters
The Aegis Sentinel is the defensive anchor. It is designed to survive pressure, occupy important spaces, and protect units that should not be exposed. A Sentinel on the correct tile can control a relay, a narrow lane, a structure approach, or the area in front of the Command Core.
Position is more important than pursuit. A damaged enemy may tempt the Sentinel to leave cover, but doing so can open the route it was protecting. Before moving, ask what becomes vulnerable when the unit leaves.
Sentinels work especially well near walls, adjacent structures, Shield Pylons, and Arc Turrets. Cover improves the value of their durability, while defensive structures force the Crown to spend more actions breaking the position.
A Sentinel can also escort expansion. Move it behind an early Runner, then replace the Runner on a captured relay. The Runner continues forward while the Sentinel turns the new node into stable territory.
Prism Lancer: ranged pressure from a protected lane
The Prism Lancer should influence combat without becoming the easiest target. Its ranged attacks are most useful when the unit stands behind a Sentinel, structure, or wall and has a clear line of sight toward the contested area.
Do not evaluate a Lancer position only by current range. Consider what the battlefield will look like after the Crown moves. A tile that reaches one enemy now may expose the Lancer to several attackers next turn. A safer tile can produce more total damage over the mission because the unit does not need to retreat or be replaced.
Use the Lancer to remove targets that threaten the formation:
- Ranged enemies that can attack around the frontline.
- Capture specialists approaching a valuable relay.
- Damaged units that can be eliminated before acting again.
- Hostile assets exposed after a Hacker disables their protection.
- Enemies blocking the route toward the objective.
The Lancer is not a substitute for vision. Fog and line of sight can prevent an attack, so combine it with Runner scouting, relay vision, Quantum Relays, or Deep Scan.
Cipher Hacker: disable the structure that blocks progress
The Cipher Hacker changes battles by turning hostile structures off for two turns. It is particularly valuable against turrets and shield pylons that would make a direct attack expensive.
The Hacker is not intended to absorb the first attack. Keep it behind the frontline until a structure becomes the key obstacle. Then move into range, disable the target, and use the temporary window immediately.
A successful breach often follows this order:
- Scout the fortified area and identify the structure providing the main advantage.
- Place the Sentinel where it can protect the approach.
- Move the Lancer into a safe firing lane.
- Disable the turret or shield pylon with the Hacker.
- Advance or focus fire before the structure returns.
The two-turn duration matters. Disabling a structure without moving the army wastes part of the window. Prepare the formation first so the Hacker's action starts a coordinated push.
Build pairs before building a crowd
A balanced army does not require equal numbers of every class. It requires complementary jobs.
Runner plus Sentinel is a strong expansion pair. The Runner captures and scouts; the Sentinel secures the node. Sentinel plus Lancer is the basic combat pair. One holds the approach while the other applies damage. Hacker plus Lancer is effective against fortified structures because the Hacker removes protection and the Lancer attacks from range.
These pairs are easier to manage than a large collection of isolated units. Add another class when the current formation cannot solve the next battlefield problem.
Use movement and attacks in the right order
A friendly unit normally moves once and attacks once per turn. Order affects the result.
Scout before moving the whole army into fog. Disable a defensive structure before attacking through its coverage. Move the Sentinel into a blocking tile before exposing the Lancer. Capture a relay before ending the turn so the new income arrives at the next start.
Do not move a unit merely because its movement is unused. A good stationary position can be more valuable than a small advance. Likewise, do not spend an attack on a low-value target when the unit is guarding against a more dangerous approach.
Replace losses by role, not habit
When a unit is destroyed, identify the missing function before deploying a replacement.
If relays are being lost across the map, replace mobility with a Runner. If the frontline collapses, deploy a Sentinel. If enemies survive behind a defensive screen, add Lancer pressure. If turrets and shields stop every push, a Hacker may be more valuable than another attacker.
A forward War Fabricator makes role-based replacement faster because new units begin closer to the fight. Without one, consider travel time before choosing a class. A slow unit deployed from the original Core may arrive after the objective has already shifted.
Support units with structures and protocols
Units become stronger when the network supports their jobs. A Shield Pylon helps a Sentinel hold longer. An Arc Turret adds damage to a lane the Sentinel blocks. A War Fabricator keeps the formation supplied. Vision structures and relays help Lancers find targets.
Tactical protocols can protect a unit composition at a critical moment. Repair Pulse can preserve a damaged frontline. Hardlight Shell can protect an essential asset. Deep Scan helps the Lancer and Hacker prepare for hidden threats. EMP Cascade can complement the Hacker during a larger fortified assault. Overclock can convert a prepared formation into an aggressive timing window.
Protocols should amplify a plan already visible on the board, not replace basic positioning.
Adjust the roster for each objective
A core assault benefits from a protected Hacker and Lancer combination that can dismantle defenses while Sentinels hold the route. A survival defense may need more Sentinels, turrets, and repair support. Relay-control missions reward extra Runners because the battlefield changes quickly. Generator sieges and shielded command nodes increase the value of disabling structures.
The final Crown nexus and later campaign sectors may require replacement capacity as much as initial composition. A balanced opening army can still fail if it cannot rebuild after the first exchange.
A practical deployment checklist
Before spending resources on the next unit, ask:
- Which objective or relay is currently at risk?
- Is the problem movement, durability, ranged pressure, or a hostile structure?
- Where will the new unit deploy?
- How many turns will it need to influence the fight?
- Which existing unit will support it?
- Can a protocol or structure solve the problem more efficiently?
These questions prevent automatic deployment and keep the army connected to the mission.
Neon Dominion's four classes are easy to recognize but deep enough to support different campaign styles. Runners make the map larger for you and smaller for the Crown. Sentinels turn important tiles into stable territory. Lancers punish threats from protected lanes. Hackers open routes that ordinary attacks would make too expensive. Use each class for its job, combine roles before adding numbers, and let the objective determine the army you build.